How to Selectively Reduce Noise in Luminar 2018 & Luminar 3
Having noise in your photos is often a consequence of your ISO speed. The higher that speed is, the more noise will show up in your image. Luckily, there are ways to combat this. Luminar 2018 has an easy way to reduce noise in your photos, and this tutorial will show you how to perfect your noise reduction techniques.
If you haven’t already, be sure to check out our other key Luminar tutorials on how to process a raw file and sharpen your photo.


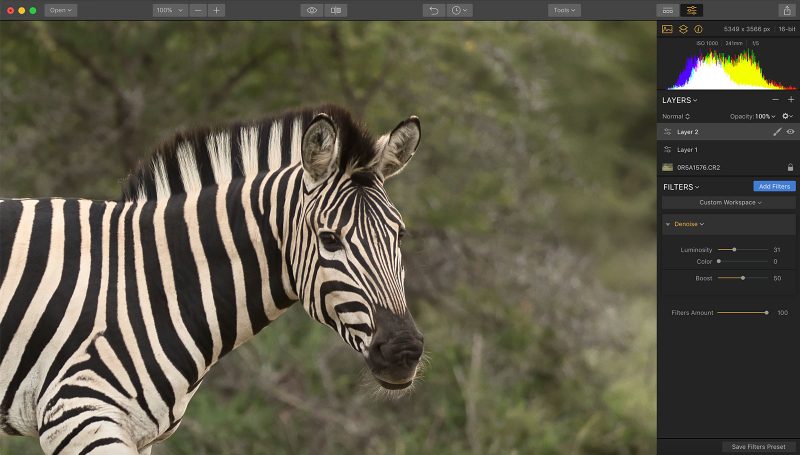
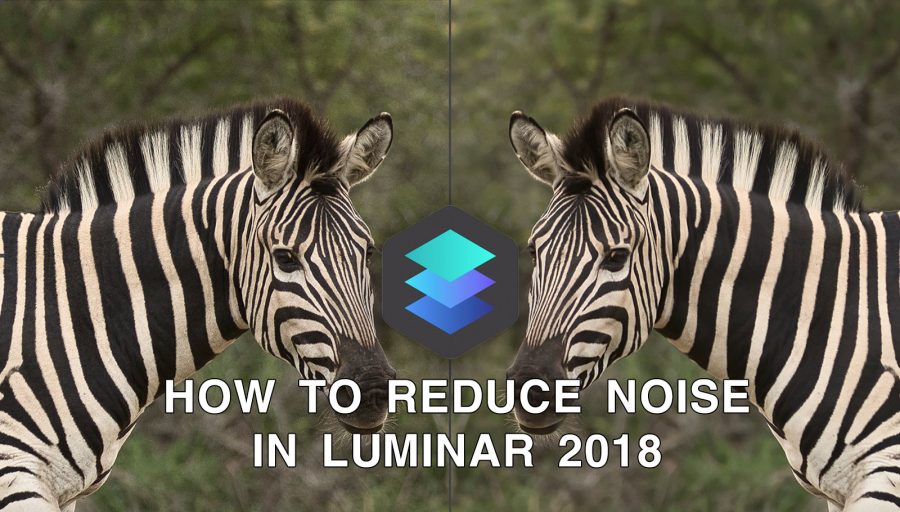
The filter we’re going to be using for this is called the “Denoise” filter. You can see the kind of noise reduction effect you can expect from the comparison below:
Not got Luminar yet? Download it now and use code NATURETTL for £9 off your purchase.
Noise reduction will smooth out noise all over the image, meaning that you can actually end up reducing details in the subject and softening it. This is not something we want to do, but luckily there is a way around this that I’m going to cover in this tutorial. So let’s get started!
Step 1: Set Up the Workspace
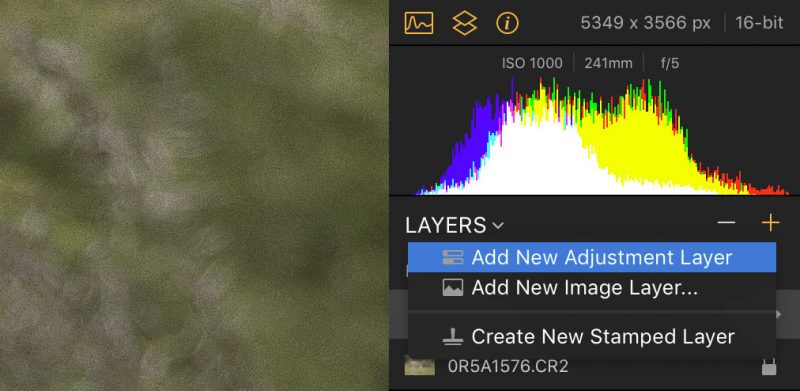
Your edits in Luminar 2018 should be done using adjustment layers, allowing you to retain a non-destructive process in your workflow and remove or change adjustments further down the line.
To do this, just hit the + icon in the layers window and select “Add New Adjustment Layer” from the drop-down menu.
Next, you need to introduce the Denoise filter. Just like when you add any filter in Luminar 2018, hit the “Add Filters” tab and search for your desired filter in the sidebar that appears.
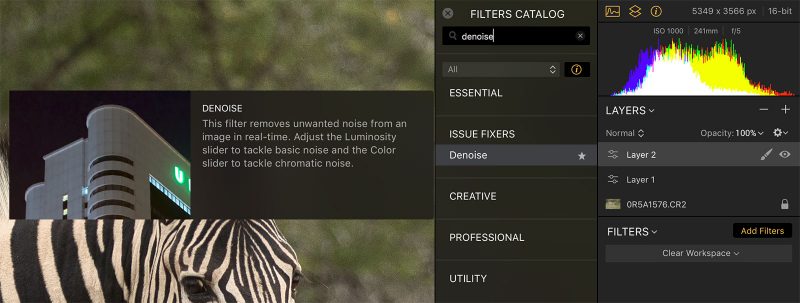
Step 2: Reduce the Noise in Your Photo
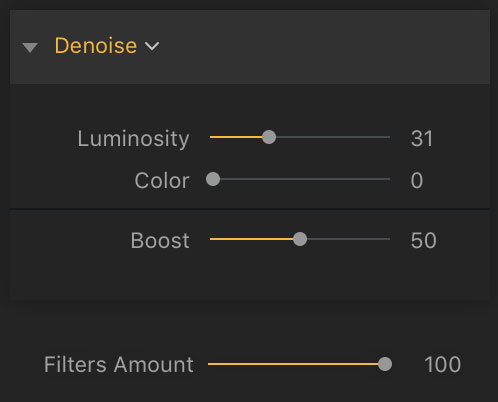
The Denoise filter comes armed with a few sliders. Here is a breakdown of what they will do to your photo:
Luminosity – This controls the amount of noise reduction applied across the photo. The higher the value, the smoother and softer the image will appear.
Color – This slider will combat colour noise in your images, something that can appear when you’re shooting at very high ISO speeds for your camera.
Boost – This slider will control the overall effect, giving a “boost” to your edits and amplifying them if needed. You can generally tweak this slider to see if it benefits your edit, but I mainly leave it alone.
Filters Amount – This is a general slider that all of the Luminar filters have, and it works like the Opacity adjustment on a layer. A value of 100 means your entire adjustment is being applied at maximum intensity, and any lower value just reduces its effect. Leave this on 100 for the majority of situations.
You should start with the Luminosity slider. Be aware that a small adjustment of this slider will result in a big change in the image. A value of around 20 will often remove the majority of the noise in your picture. If it’s particularly noisy, however, you might find that you need to push it a little higher. Use your eye to make this adjustment until you’re happy, but be careful not to go too far. You may have to settle on a little bit of noise remaining in the image, otherwise things could degrade massively.
You should only use the Color slider if you’re seeing spots (probably purple, blue, and green in colour) around the image. Otherwise, you can just leave it at 0. Still, it’s worth moving it around and seeing what it does to the shot.
Step 3: Set Up a Mask
Luminar 2018 comes packed with layer masks, allowing you to selectively apply any of your adjustments to your photo. This is a fantastic feature, enabling much more control over post production. If your noise reduction applied in Step 2 has softened the subject in your image, then you’re going to want to selectively apply that adjustment.
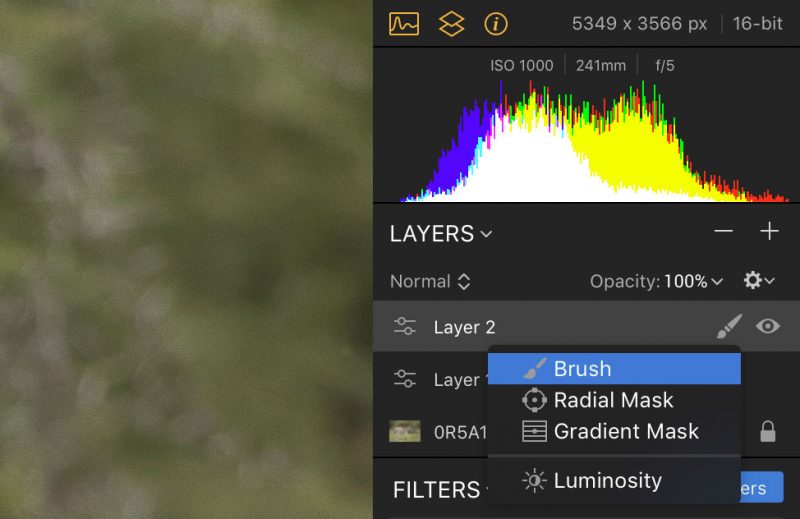
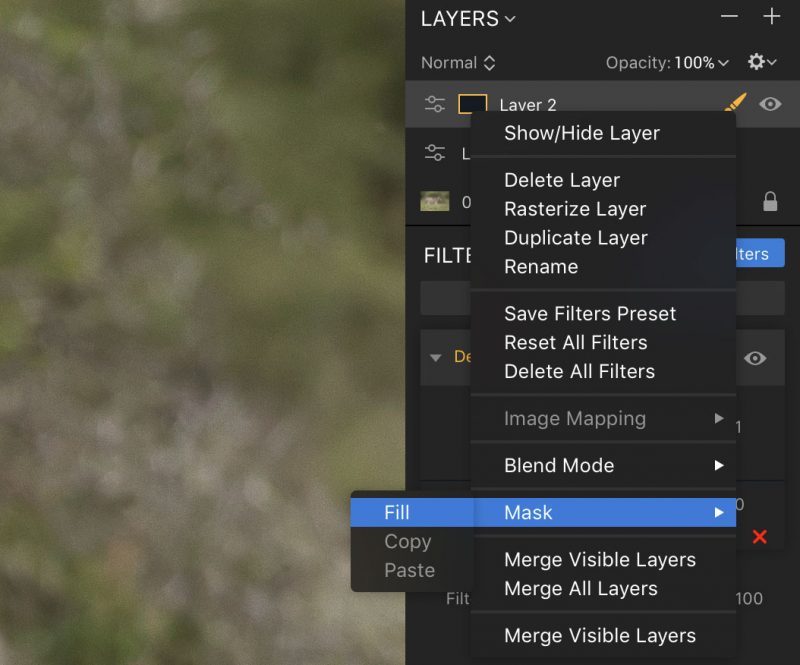
To do this, you need to create a layer mask. First, click the paintbrush next to your Denoise layer and choose “Brush”.
Once you’ve done that, right-click the brush icon and navigate to the Mask > Fill option in the drop-down menu.
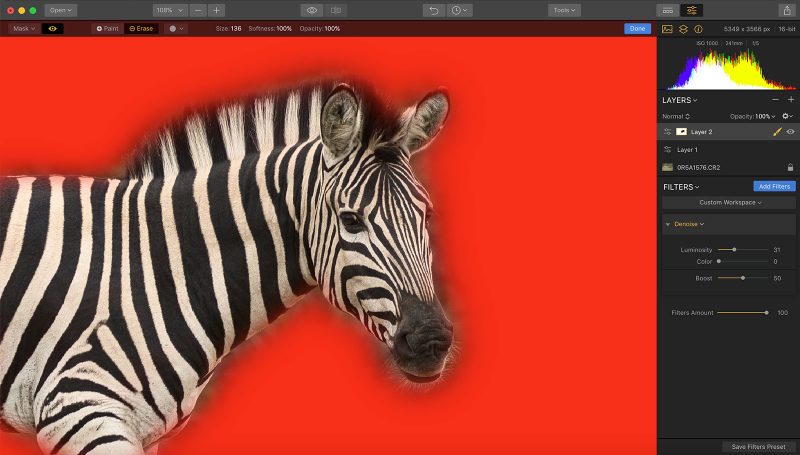
You should now see a toolbar appear at the top of your image, and it’ll have the following options:
The first thing you need to do is click “Erase,” and then move onto the next step.
Step 3: Apply the Mask to Selectively Adjust the Image
Whatever you now paint on with your brush will no longer have the Denoise adjustment applied to it. Start by painting large areas of your subject, before later moving onto the finer details.
You can adjust the brush size, softness (how much it blends into the surrounding areas), and opacity from the toolbar we’ve just looked at. You can also use the [ and ] keys on your keyboard to adjust the size of the brush quickly.
As you paint, you should start to see your edits disappearing from the area in question.
Step 4: Fine-tune Your Mask
The chances that you got that perfect are pretty slim, so now let’s look at how we can refine the brush. First, click the eye symbol in the toolbar. This will reveal the masked area of your image, shown in red, where your adjustments are being applied. The areas where you don’t want any adjustments should not be in red.
Now you can use the brush again to fill in any missed areas, and remember you can revert the brush to paint that red mask back into the image. To do this, either select it from the toolbar or hold the “Cntrl” key whilst you paint.
Once you’re happy, just click “Done” in the toolbar and your mask has been applied. You can always go back and change this later, just follow Step 3 again to return to the mask and tweak it.
You can do the application of the mask in the opposite way, however. Just don’t select “Erase” at the beginning (and don’t fill the mask area with the drop-down menu’s option), and the areas you paint in red will have the adjustment applied to them. This is useful if your subject is occupying more space in the frame than the background.
[optin-monster-shortcode id=”x9sl39uxmpofw5ftazut”]Not got Luminar yet? Download it now and use code NATURETTL for £9 off your purchase.
In Conclusion
Using Luminar 2018 to reduce the noise in your photos will become a key part of your editing workflow. Digital noise can ruin a shot, but thankfully there are ways to combat it. Whilst it won’t totally rescue and clean-up every photo perfectly, it will go a long way to making them more presentable.
You should always do your noise reduction after having made other initial adjustments, such as sharpening your photos and putting the image through the RAW Develop filter.


