How to Process Woodland Photos with the Orton Effect
Have you ever sat at your computer after a satisfying day of romping through the woods taking photos, only to find they don’t quite capture the magic you witnessed with your own eyes?
Fortunately, thanks to this short instructional video by renowned YouTuber and landscape photographer Thomas Heaton, you can bring out that enchanting woodland beauty with just a few clicks in Photoshop.


Known as the Orton effect, it adds a subtle yet ethereal glow to bustling forest scenes, which are often a notoriously difficult subject to distill into a single photograph. The technique was pioneered in the 1980s by Michael Orton, which involved sandwiching two or more negatives/slides of the same composition but different focus, whilst printing in the darkroom.
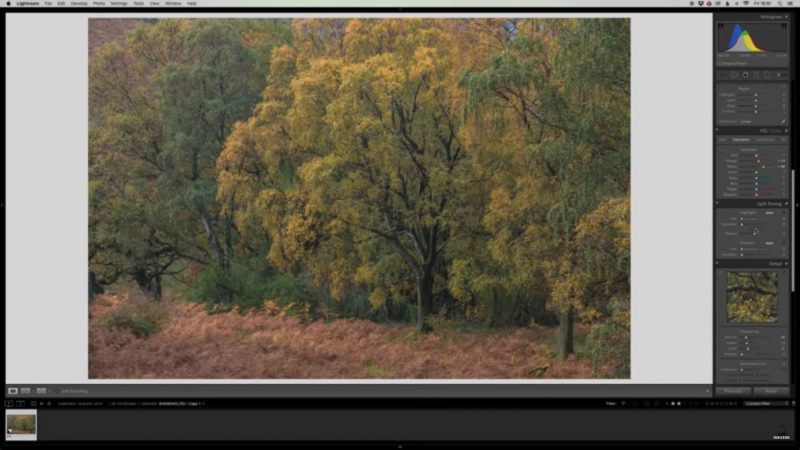
However, now firmly in the digital era, the same pleasing dreamlike effect can be mastered in a few minutes. Heaton leads us through the process, first by opening an image for a few basic adjustments in Lightroom such as contrast, highlights, vibrancy and so on.
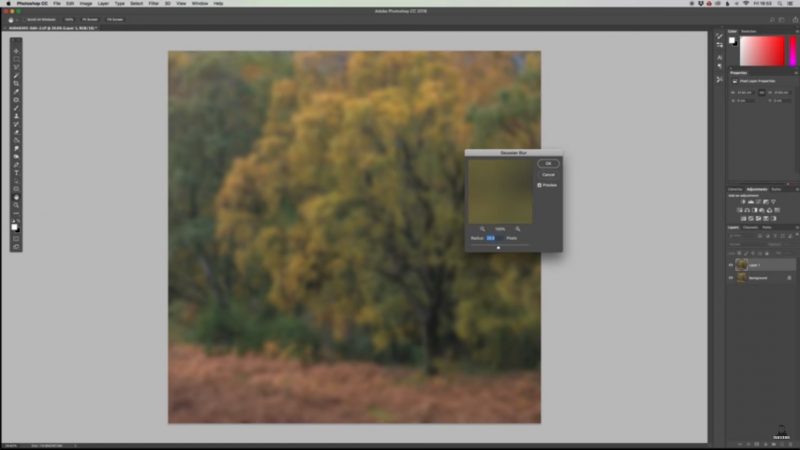
He then transfers the image to Photoshop, and checks the sharpness of the trunk and branches before proceeding. Following that, he duplicates the layer and applies a Gaussian Blur filter at around 28 or 29 pixels so the image is thoroughly blurred with the subject still visible.
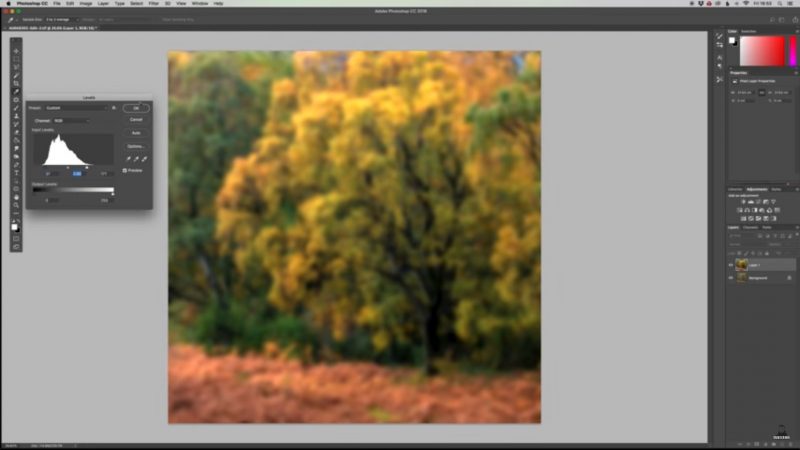
Opening the levels adjustment, he then pulls back the levels to emphasise the contrasting elements and forge a “very bright and very sickly, and quite frankly…a disgusting image.”
Popping off for a cup of tea (and you should too!) he returns to the image with fresh eyes. Bringing the opacity down to zero on the top layer, we are then faced with the original image. Heaton then gradually increases the opacity to around 10 or 11 percent, for his final eye-catching image.
For more of Heaton’s work, visit his YouTube, website, Instagram, and Facebook.


